
Next Post Preview... 🫠 I'm going to explore 3Tier and install the Nginx server (WEB server) and Tomcat (WAS) server to integrate them.
Ⅰ. Overview
Learn about Host-only, NAT, and Bridge in virtual machine programs. Find out how each of these can be configured and changed to connect in VMware. Host-only allows communication between guest operating systems, while NAT typically allows communication between the host operating system and the outside world through the host operating system. Bridge allows communication with the outside world separately from the host operating system. Install Tetris and play the game with others on a different network.
Ⅱ. Host-only, NAT, and Bridge
Before we discuss Host-only and Bridge, it would be helpful to review the previous post about NAT.
First, let me show you how to change the network in the VMware virtual machine program. Host-only, NAT, BridgeYou can change it.
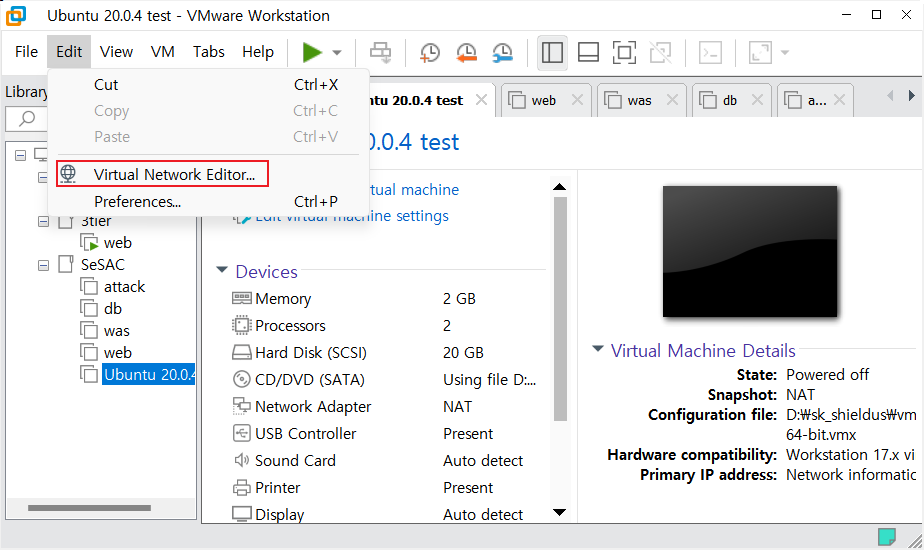
As you can see in the photo above Virtual Network EditorOnce you enter,
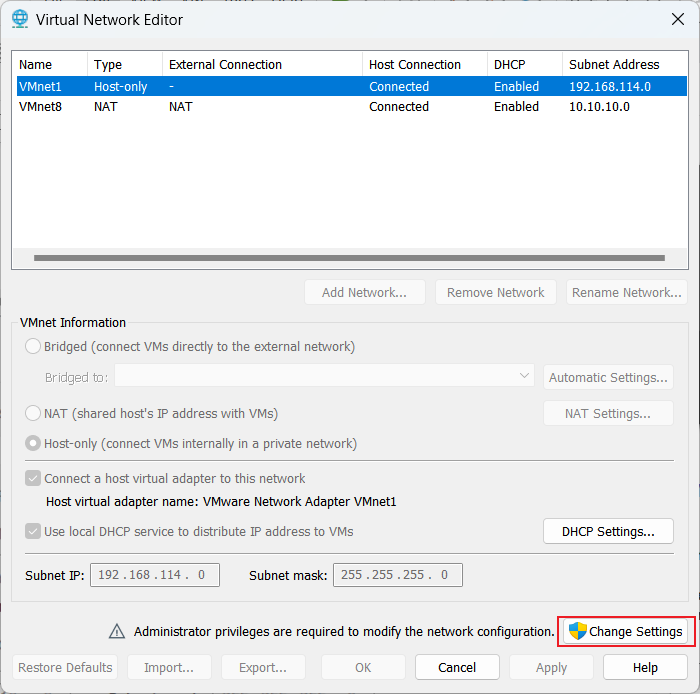
This is what the screen looks like. Here Subnet IPYou can change the settings to the address values of the A, B, and C classes mentioned earlier, or you can change the settings for Host-only and NAT. To do this, press Change Settings as shown in the image to enter administrator mode. Once you enter the mode,
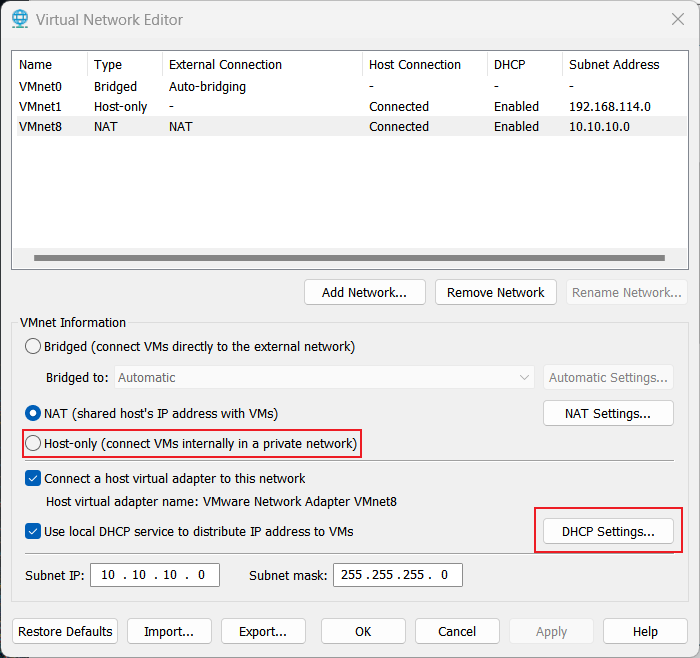
You can change this setting by assigning an IP address. Configuring the NAT DHCP serverChange or Configuring a DHCP server for host-onlyYou can also choose between host-only and NAT. Host-only is a mode where communication is possible only between VMware virtual machine guest OSs, and it blocks communication with the outside world. NAT, which is the default setting, allows communication with the outside world by assigning IP addresses through the host OS. Of course, it is also possible to connect to the host OS. To try host-only first,
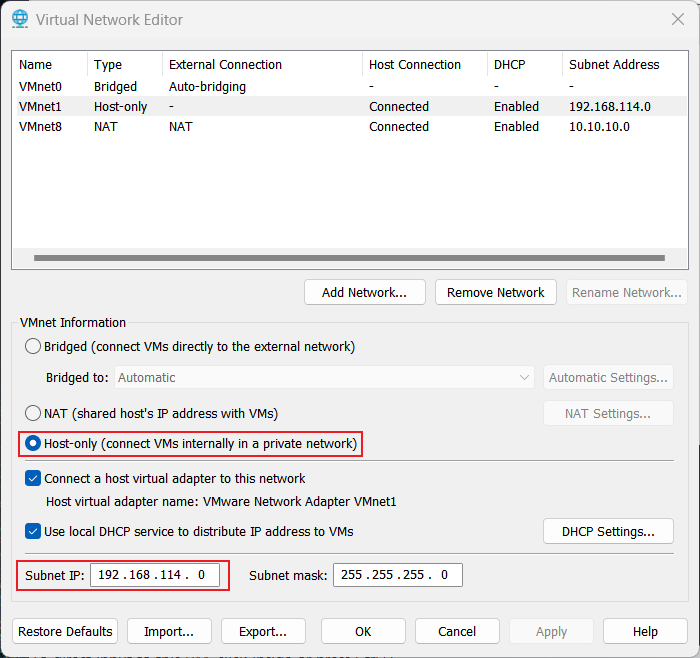
Change the IP address settings for Host-only, and click OK (you don't have to touch anything).
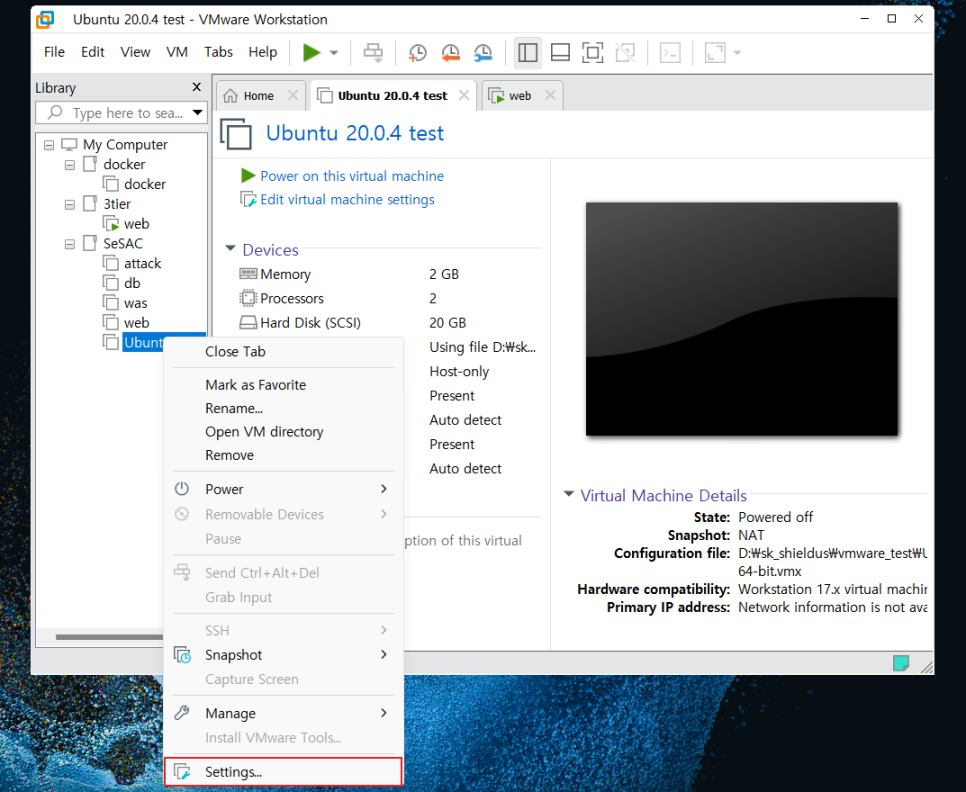
Now, in the virtual machine guest OS, go to Settings on the right side of the mouse.
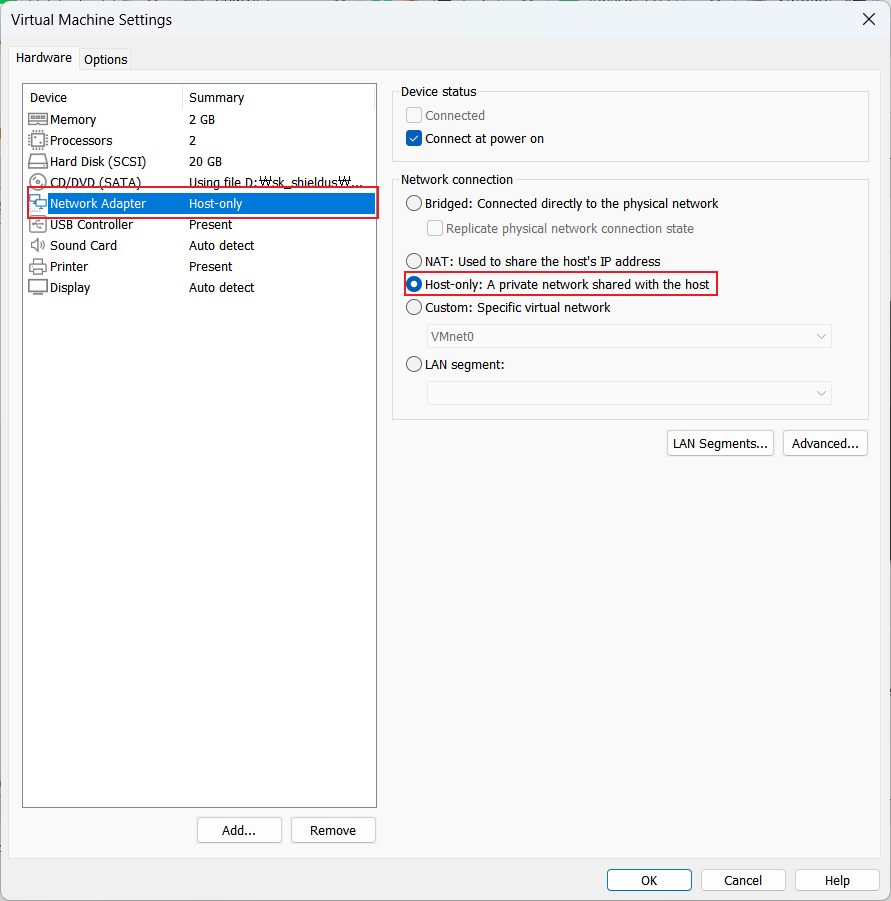
In the middle, change the Network Adapter to Host-only, click OK, and then start the virtual machine.
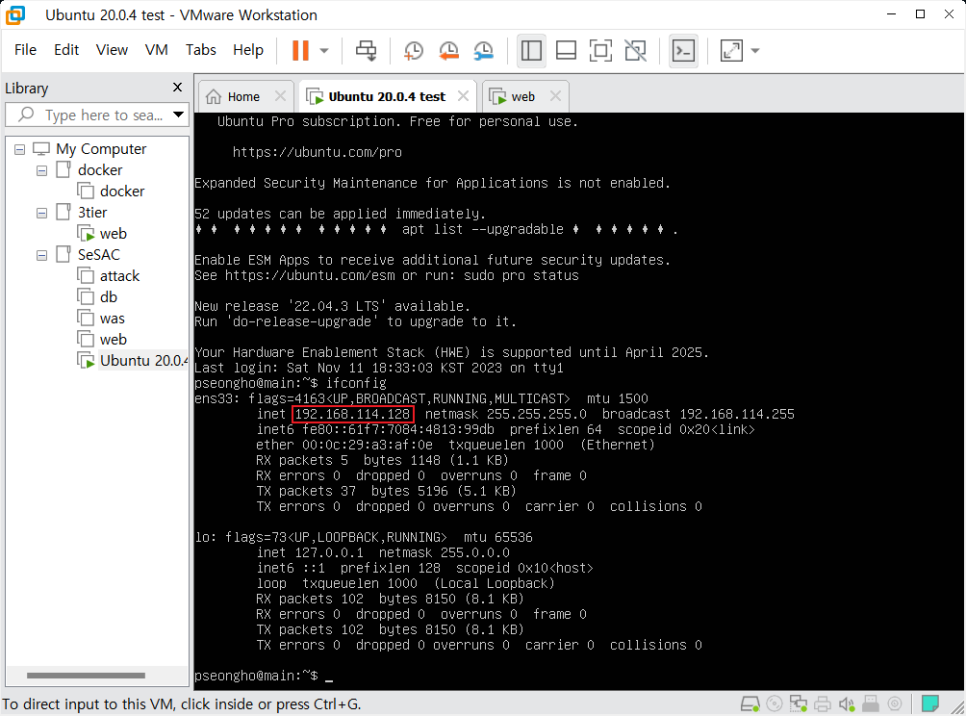
If you connect to the virtual machine and check the IP address with 'ifconfig', you can see that the IP address set in Host-only has been assigned.
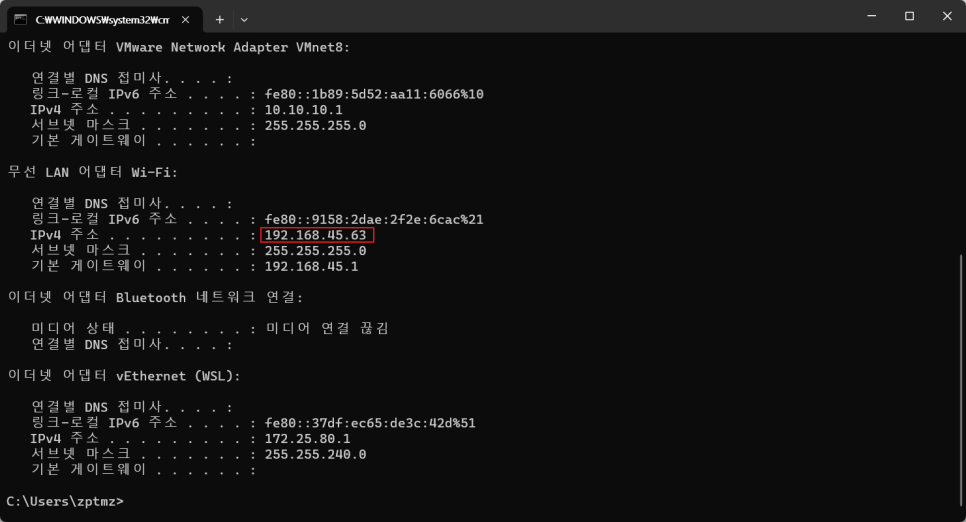
If you check the IP address of your operating system, it will appear as shown above.
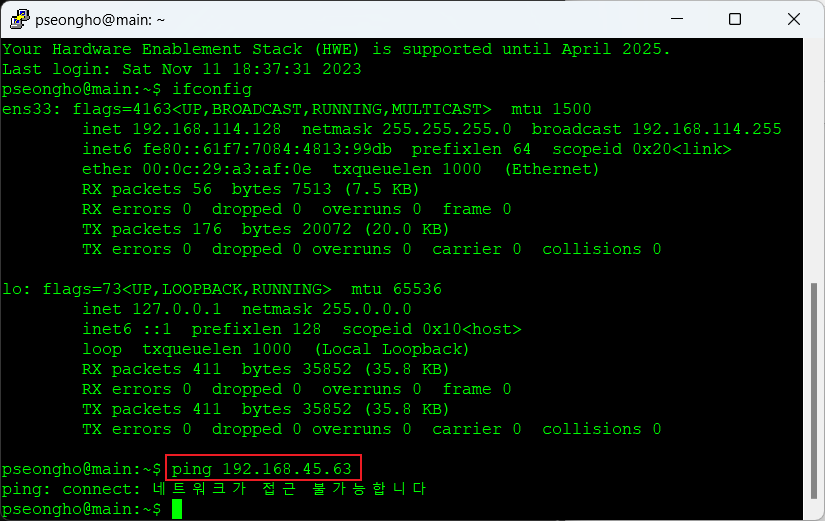
If we try to ping the host OS IP address from the Host-only guest OS to check the connection status, we get an error indicating that access is not possible.
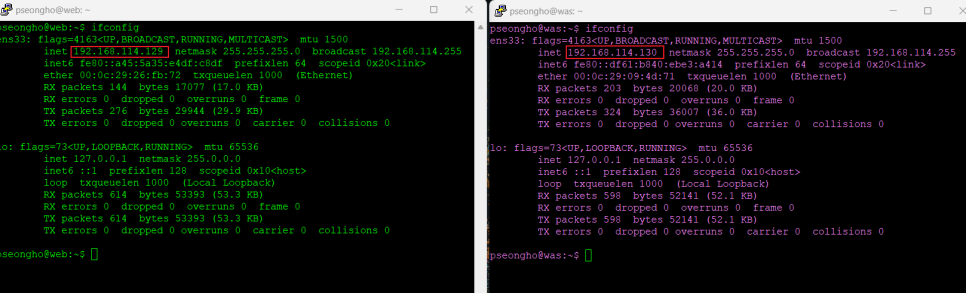
In Host-only, we know that there is no communication between the guest OS and the host OS. But what happens if we send a ping when there are two guest OSes like this?
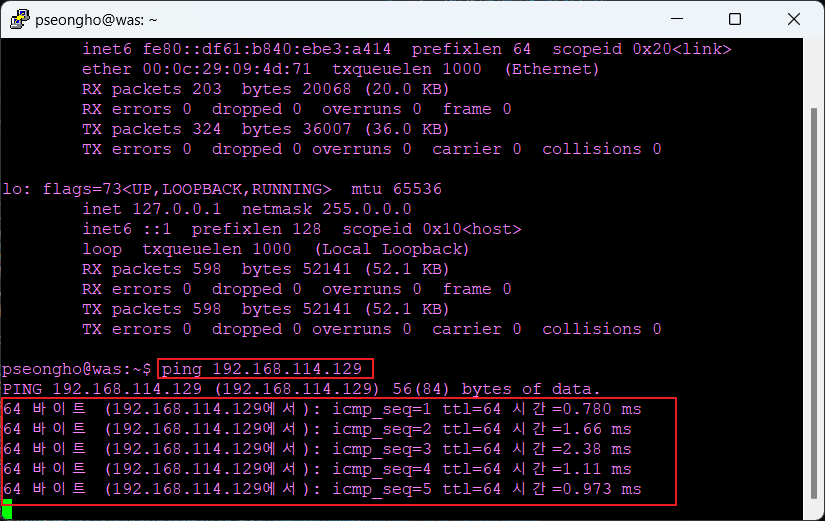
You can see that ping is working well! That is, on Host-only, the guest OSes can connect to each other, but they cannot connect to the host OS.
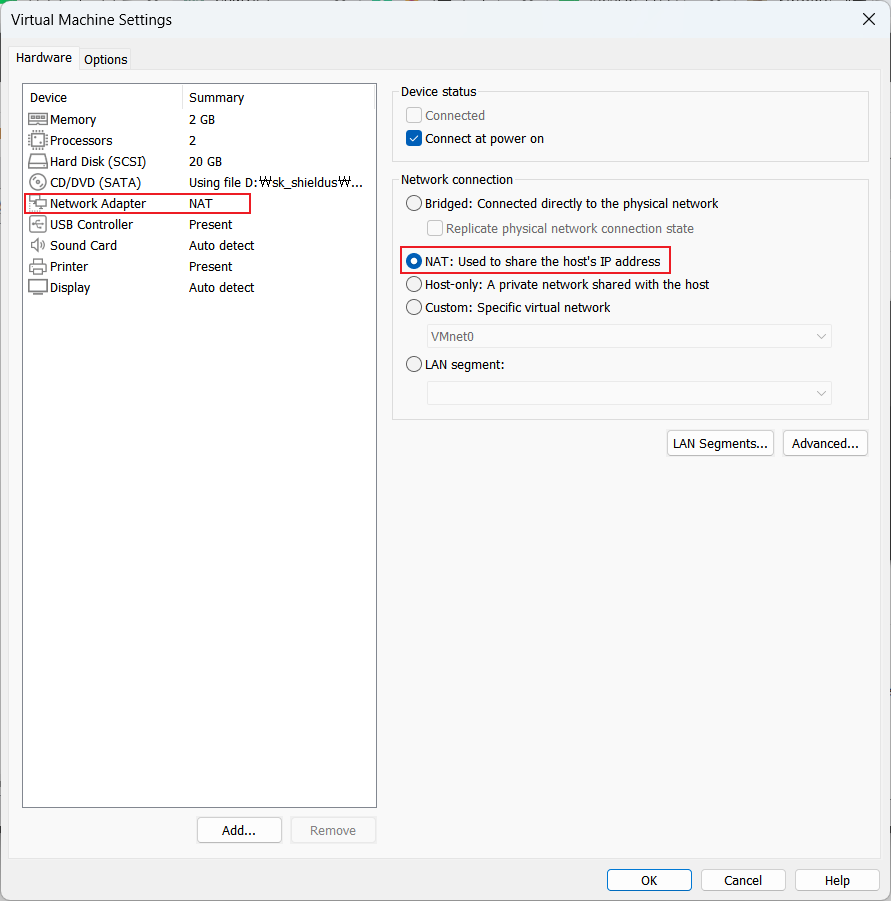
On the other hand, if you change to the NAT guest OS and send a ping to the same host OS IP address as shown below,
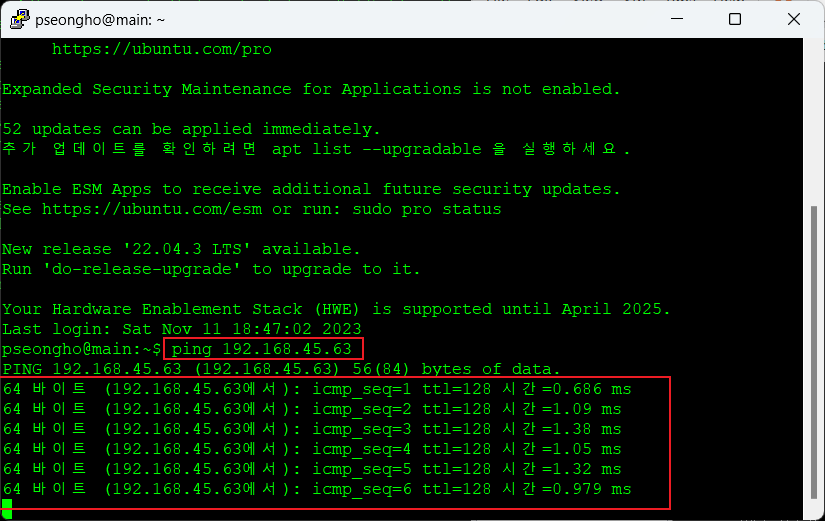
You can see how the packets are flowing!
Earlier, we were able to change settings such as DHCP server configuration or manual IP address assignment in the Virtual Network Editor in VMware. In the Linux guest operating system of the virtual machine, we can change the settings with 'nmtui'. When we enter the command, this window appears:
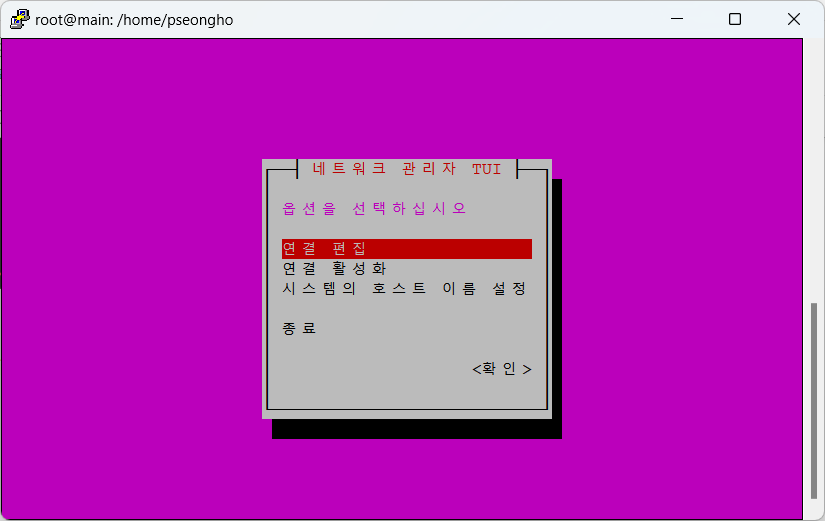
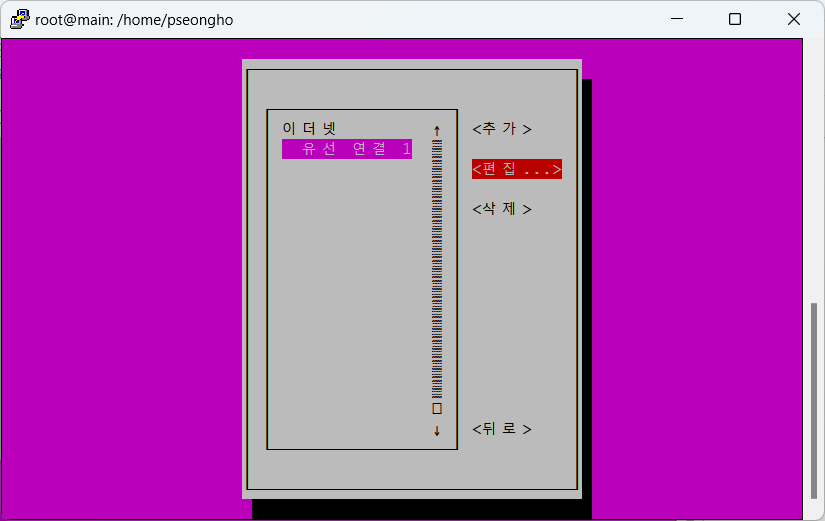
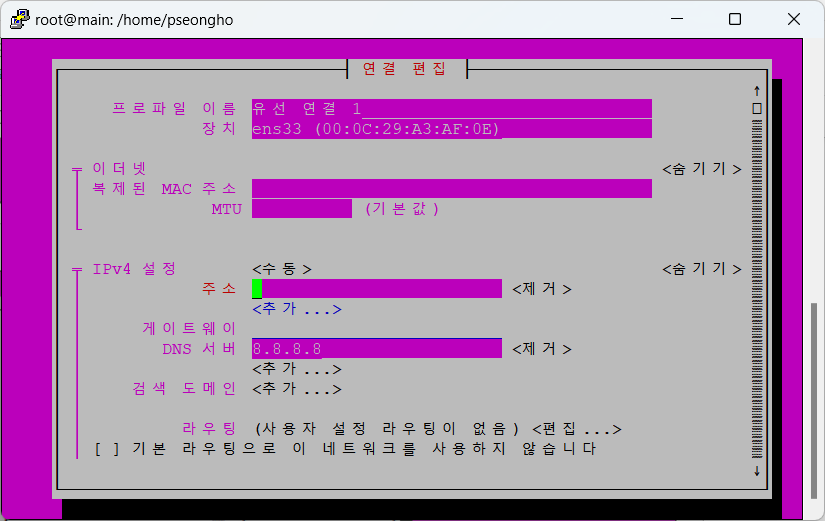
If you enter it in this order, you can not only change the MAC address or IP address, but also the DNS server address.
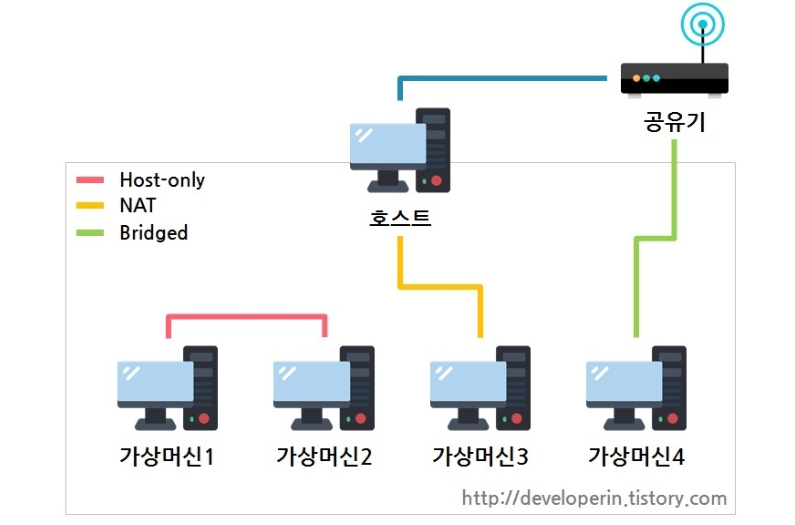
Before we explain Bridge, let's look at the above image. Host-only and NAT can be understood at once. While Bridge does use the hardware of the host OS, it means that it has a separate LAN card, and can be assigned an IP address by the router, communicating directly with the outside world without going through the host OS.
※ For understanding, assume that the guest OS on the virtual machine has a separate LAN card.
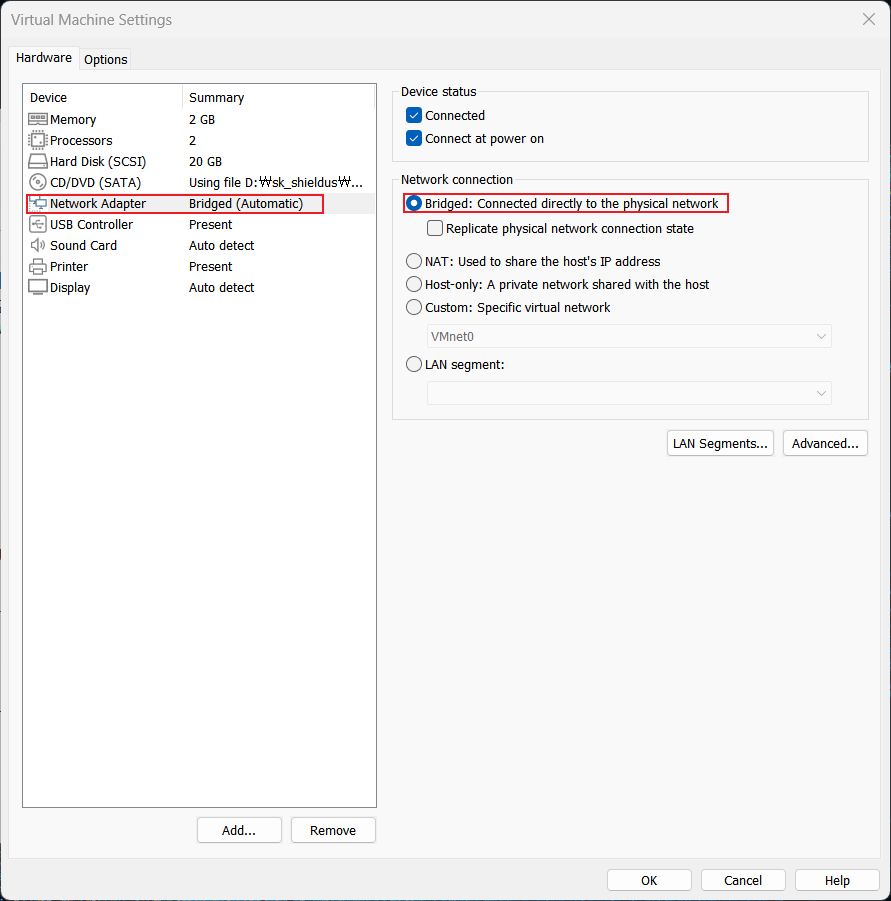
This time, go to Settings, change it to Bridge, and boot the virtual machine.
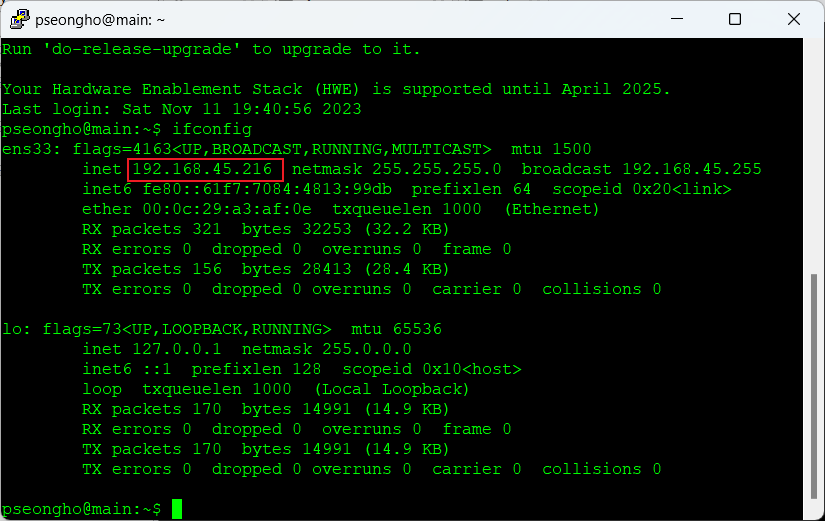
As you can see, it has been assigned the same network IP address as the host OS we saw above. Now, let's try playing Tetris on the guest OS that has been converted to a bridge, as shown below!
※ If you did not receive the IP address assignment immediately, as shown in the above image 'sudo dhclient -v' Let's execute the command.
Ⅲ. Tetris
I would like to introduce Tetris, a game that can be enjoyed on Linux (Ubuntu). When studying Linux and networks, there are many difficult parts, and it can be fun to take a break from memorizing commands.
vitetris: Text-mode Tetris for Linux
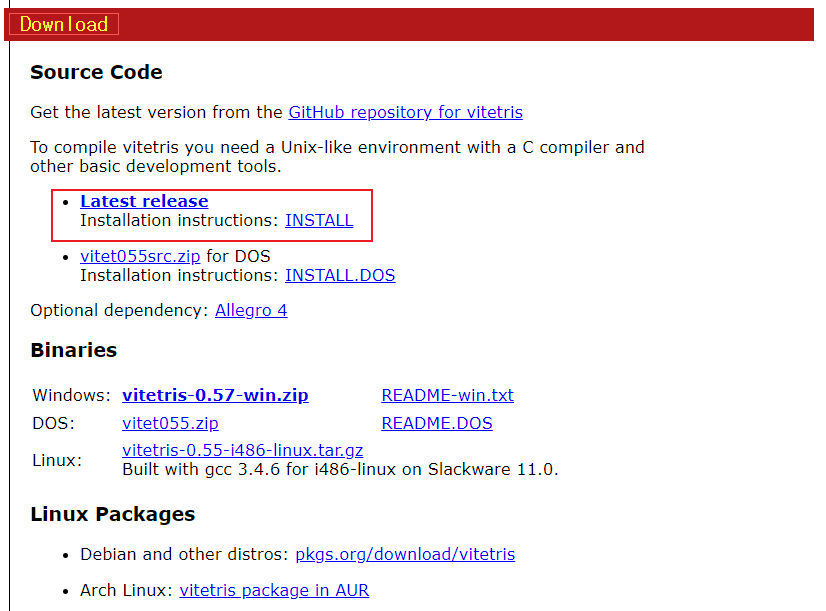
If you go to the above site and click on the middle, 'Latest release' You can download the latest version of the Tetris source code.
Release 0.59.1 · vicgeralds/vitetris
If you enter, you will be connected to Git and receive the Tetris source code version 0.59.1, which will be available in both zip and tar.gz formats. If you are using Windows, you can download the file directly. 'WinScp'through programs such as Send Files to the Linux Operating System on a Virtual Machine 'wget' There is a way to copy the address link with a command and download it directly on Linux.
wget https://github.com/vicgeralds/vitetris/archive/refs/tags/v0.59.1.tar.gzGenerally, Linux tar.gz Since the extension compresses or decompresses files, if you right-click on 'Source code (tar.gz)' and select 'Copy link address', you can get the address to download it. If you run the above command in the directory where you want to download the file, it will be downloaded immediately.
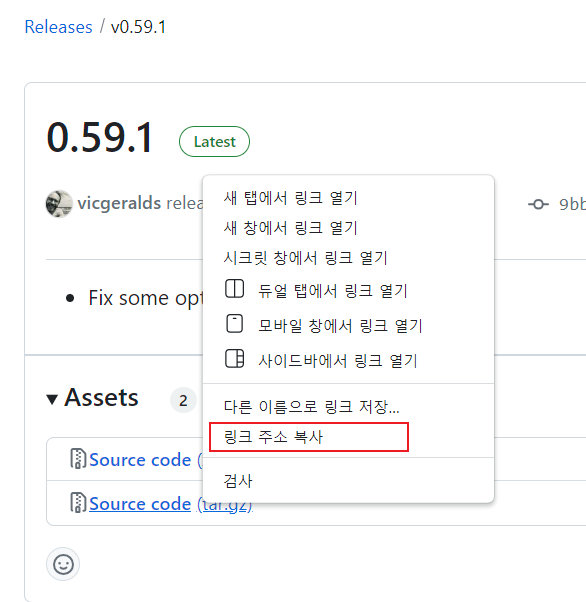
If you copy the link address and enter it as above, it will be downloaded. Then, simply use the 'tar' command to extract the archive.
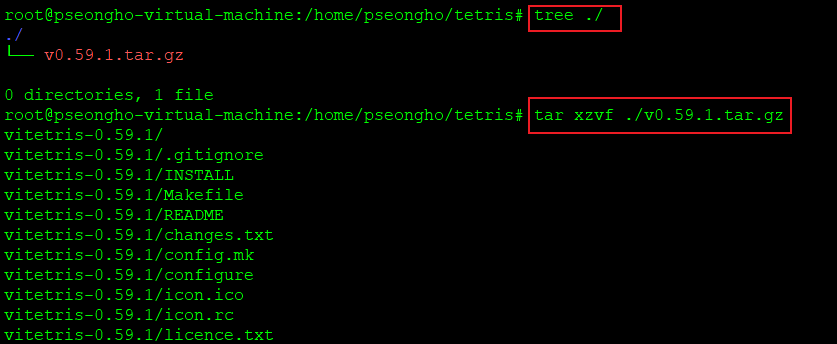
※ To introduce a good package here, Linux does not show directories clearly like Windows, so it is not good to use the 'ls' command. 'tree'If you use the package with 'apt install tree', it displays the directories in a tree format, which is very nice to look at.
Finally, we need to install one more package. Since the file we downloaded is simply source code, we need a library that can compile and run it. For example, to run a Korean file, we need a Korean program installed, similar to how a Korean program is required to run a Korean file.
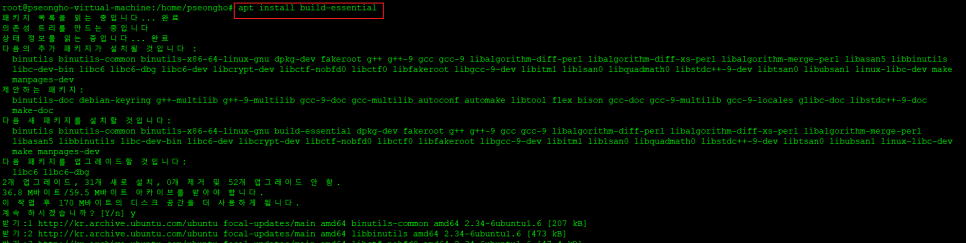
So this is how 'apt install build-essential'Once you install it, you're really done. Install it and go into the extracted directory.
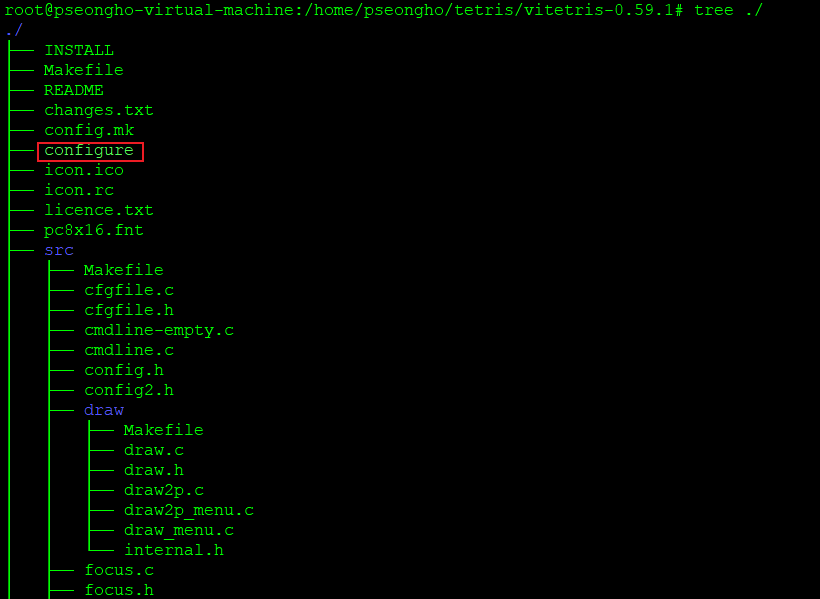
There are so many files, and you will see the configure file. configure Run the file to execute the configure script to adapt the source code of the Tetris game to my current system.
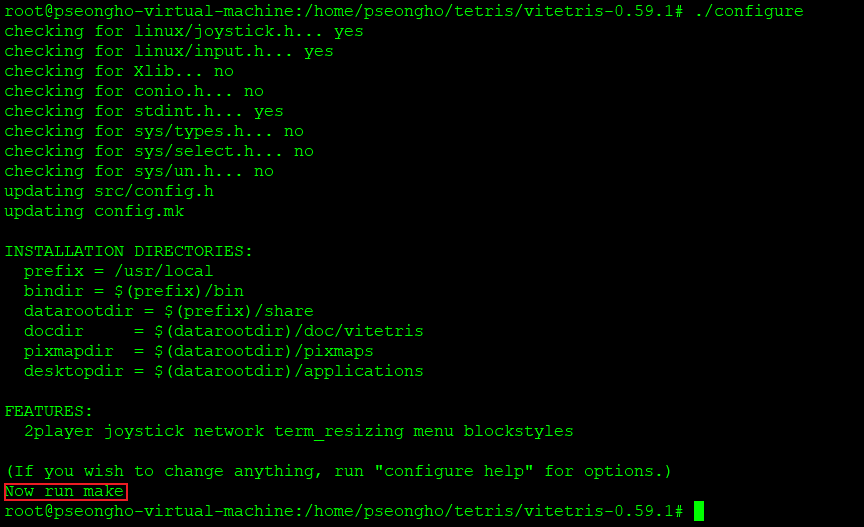
When executed, makeWhen you enter make, it will prompt you to do so and then adjust the settings for you, as shown below.
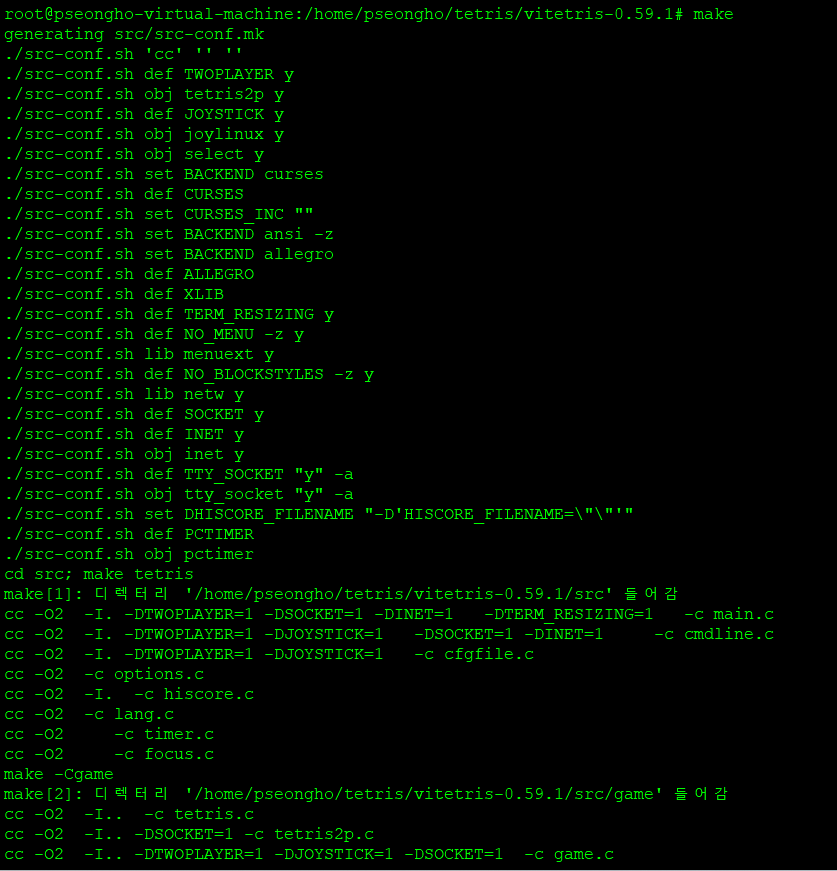
So now all that's left is to actually start the Tetris game.
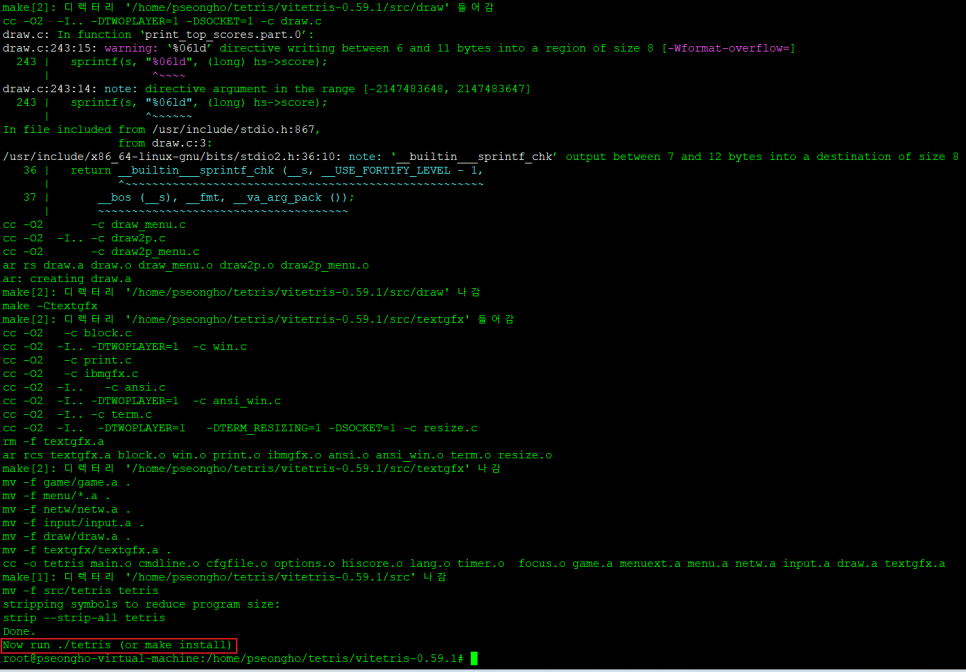
In the above image, to start the Tetris game, './tetris'If you enter it, it says it will run. When you enter it, it comes out like this!
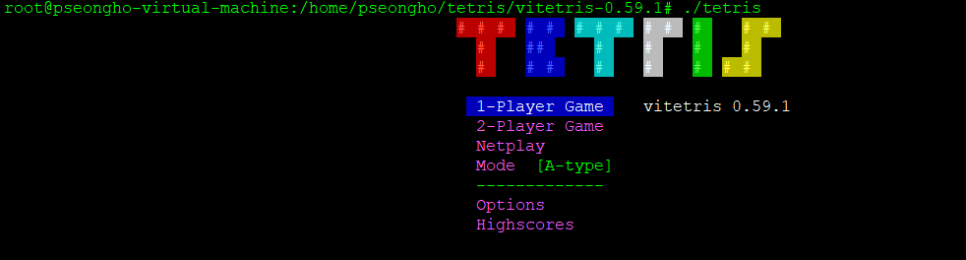
Now all you have to do is enjoy the game, but what if you want to play with a friend who shares the same network?
'./tetris list port number'If you enter and run
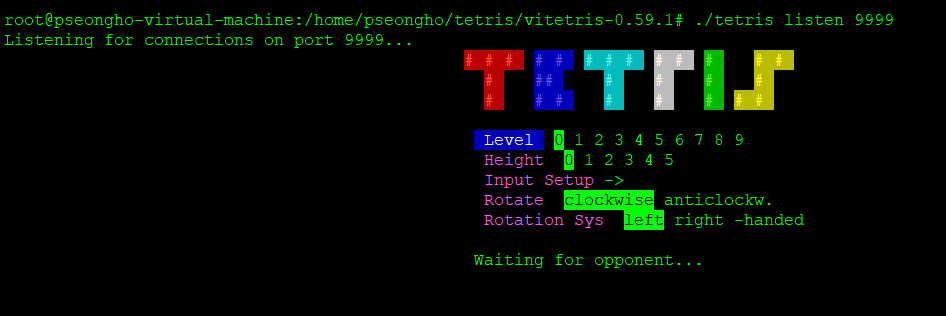
This way, the server opens on port 9999 and waits for someone to connect.

You can see that the service is open in the 'LISTEN' state! How can the other party connect?
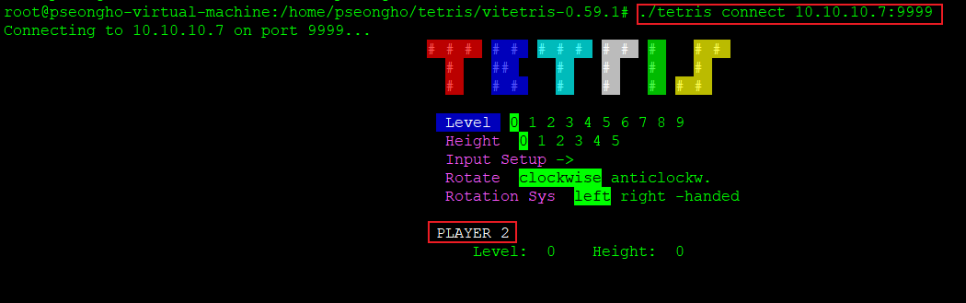
So './tetris connect IP address:port number'If you enter that, you can see that it connects and displays PLAYER2 below! Now you can enjoy the game.
※ You can also enjoy the game by changing the network to allow communication with the outside world via the bridge. 😃
Reviews
This time, I posted about the VMware network changes we did in the previous class and the fun Tetris game. I’ve been posting based on what I’ve learned so far for almost two days, and I’m finding a lot of confusing parts to look up... 🥲 I also think I should post it right away, but I’m going to try to upload everything up to the 3Tier section. If the circumstances allow, I’ll also try Docker.