
Next Post Preview... 🫠 To complete the 3Tier, we are trying to integrate the DB server with the existing Nginx server and Tomcat server.
Ⅰ. Overview
Let's learn about the 3Tier structure. 3Tier is typically composed of a web server, a WAS server, and a DB server. While this basic framework does not change when providing services, the detailed configuration and environment settings may vary depending on the architecture. In the practice session, we will build an Nginx server and make it operate as a web server. Once the Nginx server is running normally, we will install a WAS server based on Tomcat. After connecting the Nginx server and the Tomcat server, we will check whether the WAS server is connected when accessing the web server.
Ⅱ. 3Tier
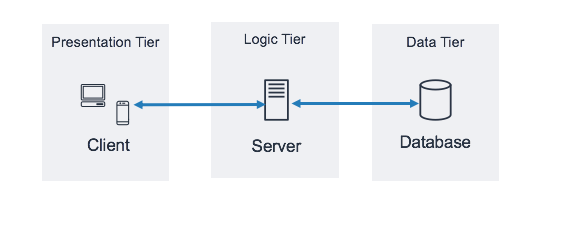
3-tier architectureAs you can see in the picture above, when providing one service The structure in which three servers are operatingThis means that the work of the front-end, which is primarily displayed directly to the client, is done WEB serverWhen the client uses the service, it performs a specific action or interacts with the database to display the desired information to the client. WAS ServerThere is a WAS server. DB Server You can also query the database, insert data, or perform operations such as modifying and deleting data. The DB server is the database that stores the data. While providing services, this basic framework does not change, but ArchitectureDetails regarding the policies under which the service will be provided may change.
※ ArchitectureWhat is architecture? It refers to the concept of describing system configuration and operating principles, the relationship between components and the relationship with the external environment, and the level of design and implementation support for system components. This may be difficult to understand. In simpler terms, when we create a website, architecture refers to how the design will be done, how much personal information will be collected when members sign up, how much authority will be given to general members, non-members, and specific bulletin boards, who can leave reviews in the case of a shopping mall, whether non-members can place orders, and so on. It is good to think of architecture as the overall configuration of how services are provided, displayed, and managed in accordance with the purpose of a particular website. There are many types of architecture, and it is a very broad field that requires a lot of study. If you want to know more, we recommend that you search for it.
In other words, when a user enters a Naver address and connects, the WEB server Access by IP addressdo (we simply www.naver.com Even if you type it, it won't be visible. DNS serverThis is done by accessing the Web server of the Neaver. The Web server serves as a gateway to the WAS server, so the services provided by the WAS server are available through the Web server. Various servicesFor example, when we log in, the WEB server calls the login-related services implemented by the WAS server, or when we click on the news, shopping, or sports tabs on Naver, the WEB server also calls the services implemented by the WAS server. After all, the WAS server is the actual service provider. However, the vast amount of data, such as member information when logging in, various information displayed when searching, news, shopping products, etc., is not stored on the WAS server. DB (Database) ServerSo the WAS server is connected to the DB server. Retrieves and imports data that is appropriate for the services being provided. For example, when a user posts a blog entry, the WAS server can request the DB server to store, modify, or delete the newly posted blog entry as data. The DB server performs the actual storage, modification, and deletion, and stores the data. Think of the DB server as the place where all the data we encounter on the website is stored.
※ Since this is a simple 3-tier architecture, there is more to it. We will study and add more details, such as how to configure network architecture and firewalls, and how to connect multiple WAS servers and WEB servers.
Ⅲ. Nginx
Before you start practicing, it's helpful to know some simple commands.
Commands | Function Description |
sudo apt install nginx (package name) | Install the package with administrator privileges. |
sudo apt remove nginx | Delete the package installed with administrator privileges. |
sudo systemctl stop nginx (server) | Stop the server that is running with administrator privileges. |
sudo systemctl start nginx | Run the server with administrator privileges. |
sudo systemctl restart nginx | Restart the server with administrator privileges. |
sudo systemctl enable nginx | Register the server as a startup program with administrator privileges (similar to the startup programs in Windows). |
sudo systemctl disable nginx | Remove the server from the Startup program with administrator privileges. |
These are system commands related to installing, deleting, starting, restarting, and stopping the server. Knowing them can be useful.
I plan to install Nginx, which is the most commonly used web server, and practice building a 3Tier system. There is also Tomcat, but each has its pros and cons. To put it simply, For Nginx, performance is superior to Tomcat when traffic is high. Tomcat is There are a lot of subprojects, and they have strengths in terms of functionality and module expansion.
Install the Nginx server.
sudo apt update
sudo apt install nginx
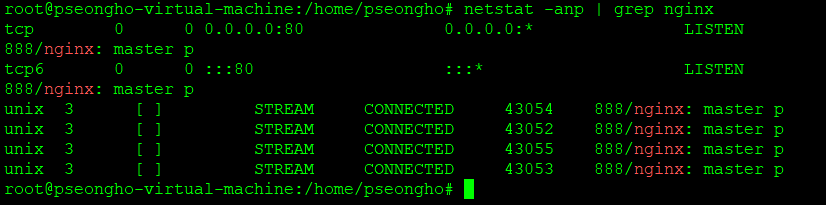
※ As soon as the nginx server is installed, it is registered to be controlled by systemctl, and the server starts automatically. You can check this by running 'netstat -anp | grep nginx'.
2. Connecting to the Nginx server
If you think about file structure, /etc usually contains configuration files, /var usually contains data files or log files. The same is true for the Nginx server. /etc/nginxThere is a configuration file /var/www/htmlThis contains the implementation source files.
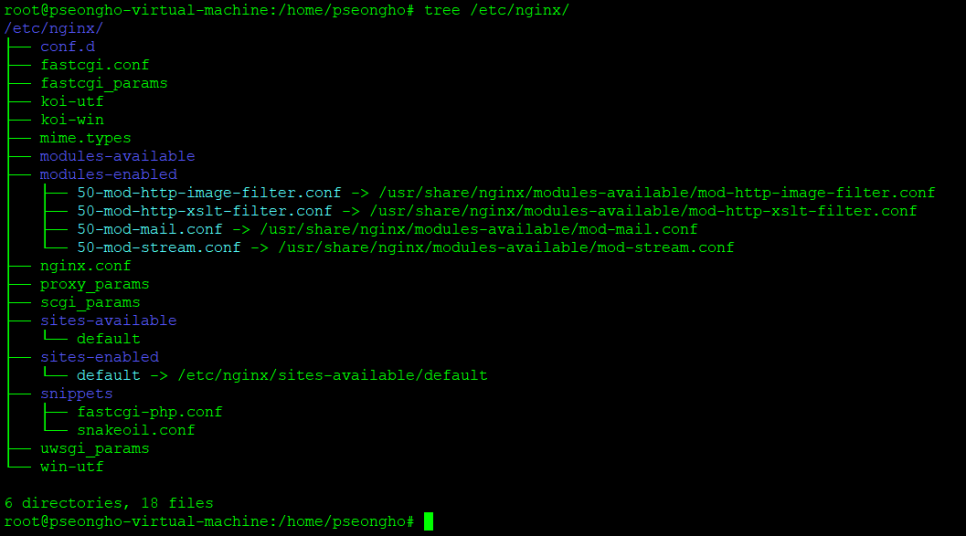
You can view the configuration file in detail by going to /sites-available/default.
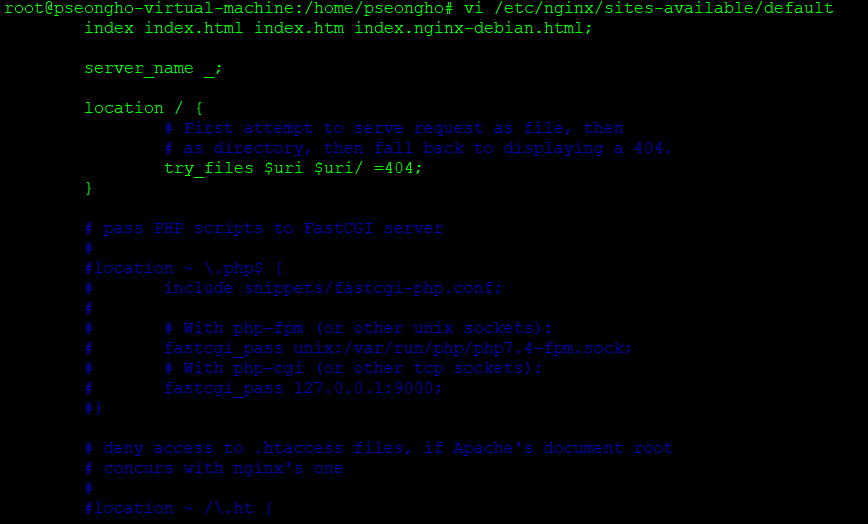
We will return to this section later when we register the necessary settings for integration with the WAS server.

/var/www/ html Now index.html We will create a file and actually connect to the WEB server. Once we navigate to this path, we will use the vi editor to create the index.html file. html Create one and write the contents simply.
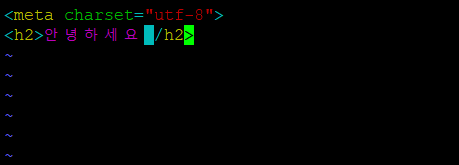
I wrote it this way, and if there are any tips here, vim Installing the package makes it much easier to use the vi editor. Or
cat > 파일명
cat >> 파일명
When viewing file contents 'cat' Using the command '> If you enter the file name, you can create a text file with that name. If the file name is the same, '>In this case, the contents will be overwritten, and the following>>In that case, the content is added.
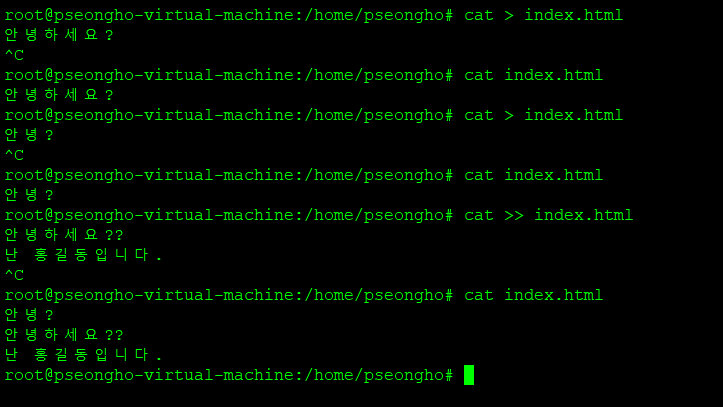
Now it's time to check whether the contents of the index.html file we created are displayed correctly when we connect to the Nginx server. Using the 'netstat -anp | grep nginx' command we gave above, we can see that the server is LISTEN After checking the status, if it is correct, try connecting immediately.
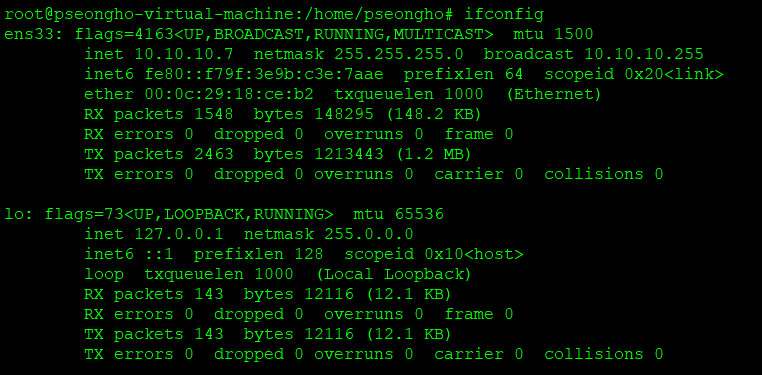
'ifconfig'Just connect to the IP address that appears. When you enter,


You can see how well it's coming out!
※ As a TIP HTTP response I would like to share the status codes that can be seen in this regard. Since it is a brief summary, I recommend that you look up the details.
Status code | Status description |
100 series | The client has sent a request to the server, and the server is also waiting for the request. |
200 series | You can see this when the client and server communicate normally. |
300 series | The server requests that the client perform additional work (redirection) to complete the request. |
400 series | Occurs when the client is unable to receive the corresponding resource from the server. |
500 series | This means that there is an error on the server itself. |
Ⅳ. Tomcat
Then install Tomcat WAS ServerWe're going to start with a hands-on exercise using Tomcat. The installation may seem a bit complicated, but it's actually not that difficult.
Apache Tomcat® - Apache Tomcat 9 Software Downloads
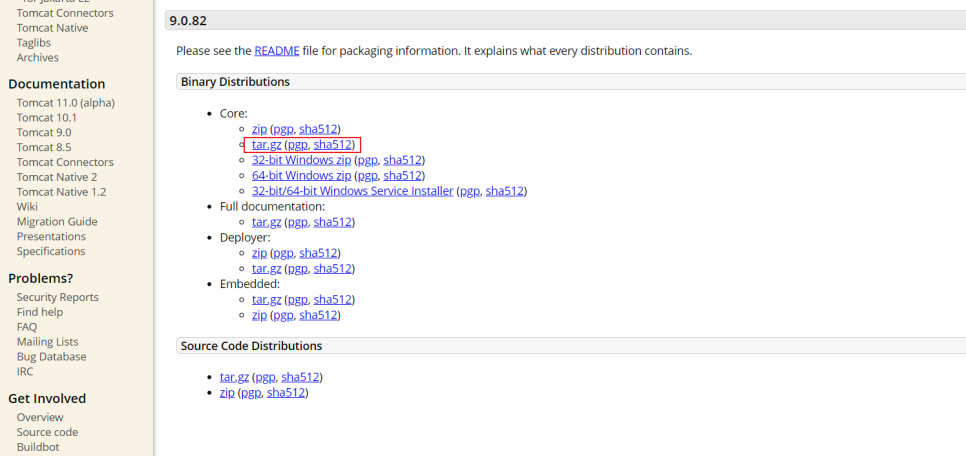
First, above tar.gz on the Tomcat web pageThe latest version is 9.0.82, and other versions can be downloaded from the website. The path to the file to be installed is the program installation directory. /usr/local You can download it using the 'wget' command. Move to the /usr/local directory and uncompress the tomcat file downloaded with wget.
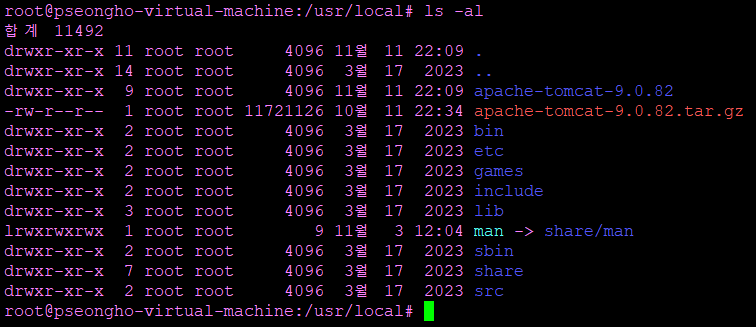
It will look like this. You can keep the file name as it is after decompression, or change it freely.
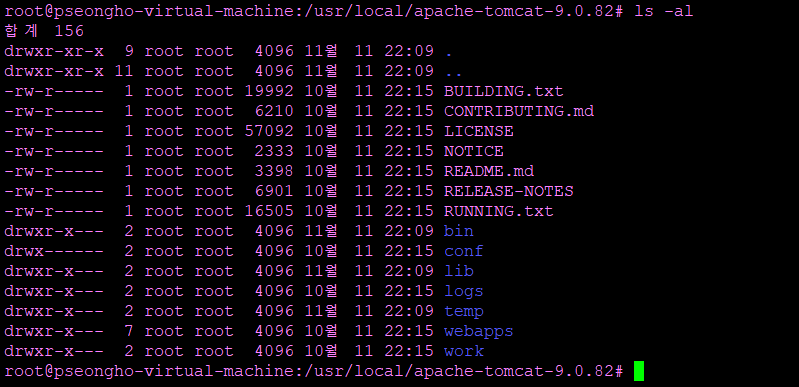
If you go inside, it would look like this. /confis the configuration-related directory, /libThere is a library here, and we will install the Connector for connecting to the DB server at this path later. /webapps The directory is where you can store web service-related files such as JSP, CSS, and HTML. Then, you can install the JAVA language.
sudo apt install openjdk-17-jdkIt installs Java 17. Recently, the Spring Framework also supports versions 17 and later, and for version 8, the support period is not long, so I think many people are working with version 17. To check whether the Tomcat server is running normally, /usr/local/apache-tomcat-9.0.82/bin Enter the path startup.sh You just need to run the script file. Since Tomcat was installed separately, not with the 'apt' command, the server does not start automatically.
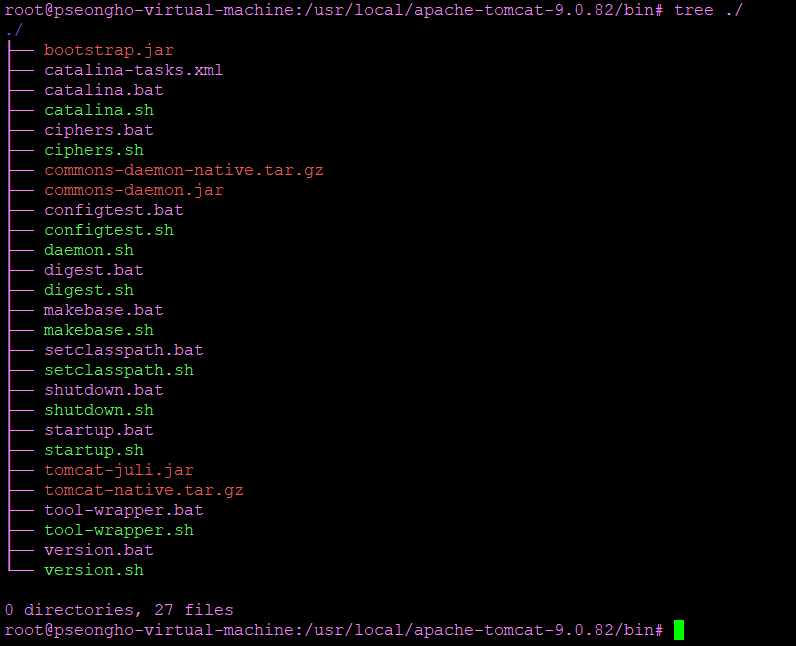
Server shutdown shutdown.sh Just run the script file.

The server is running normally. LISTEN You can check the status. For Tomcat, the default port is 8080That's something to know.
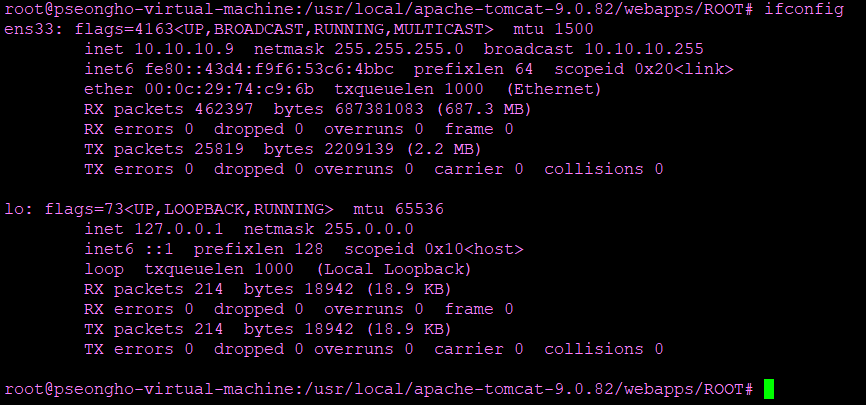
Now, let's connect to the Tomcat server at the IP address and port number 8080 and make sure it is functioning properly. Nginx serverof /etc/nginx/sites-available/default Modifies the configuration file.
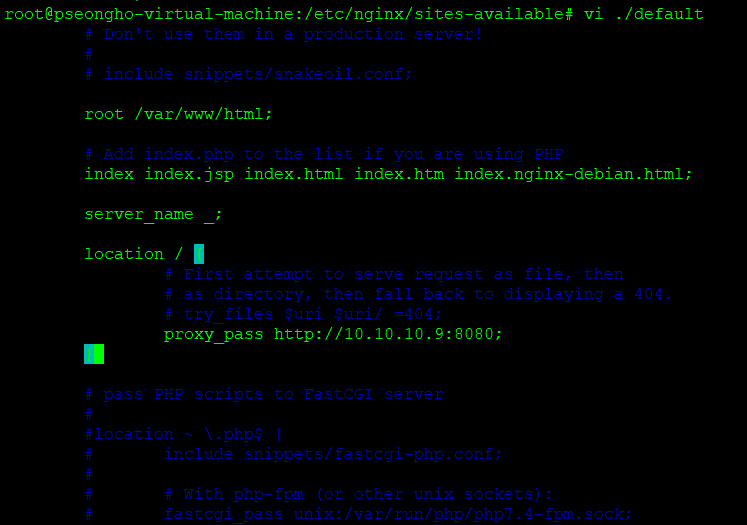
So, add proxy_pass and index.jsp. 'sudo systemctl restart nginx'If you provide the URL and connect to the WEB server IP address,

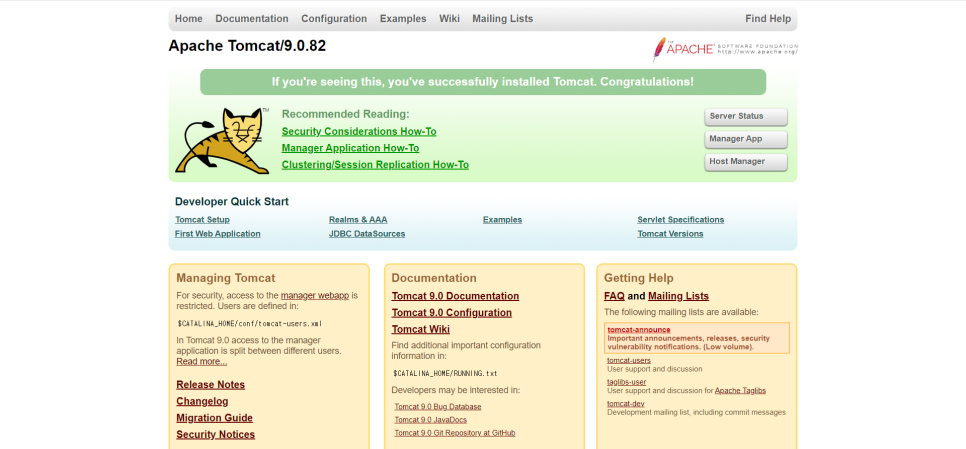
You can see that the connection to the Tomcat (WAS) server is working properly!!!
Reviews
I think the process of installing and connecting the web server and WAS server was not difficult. Since the DB server to be posted later is a bit tricky, I plan to study it by trying it from the beginning again, just like I did when I posted it while rebuilding it. 😄